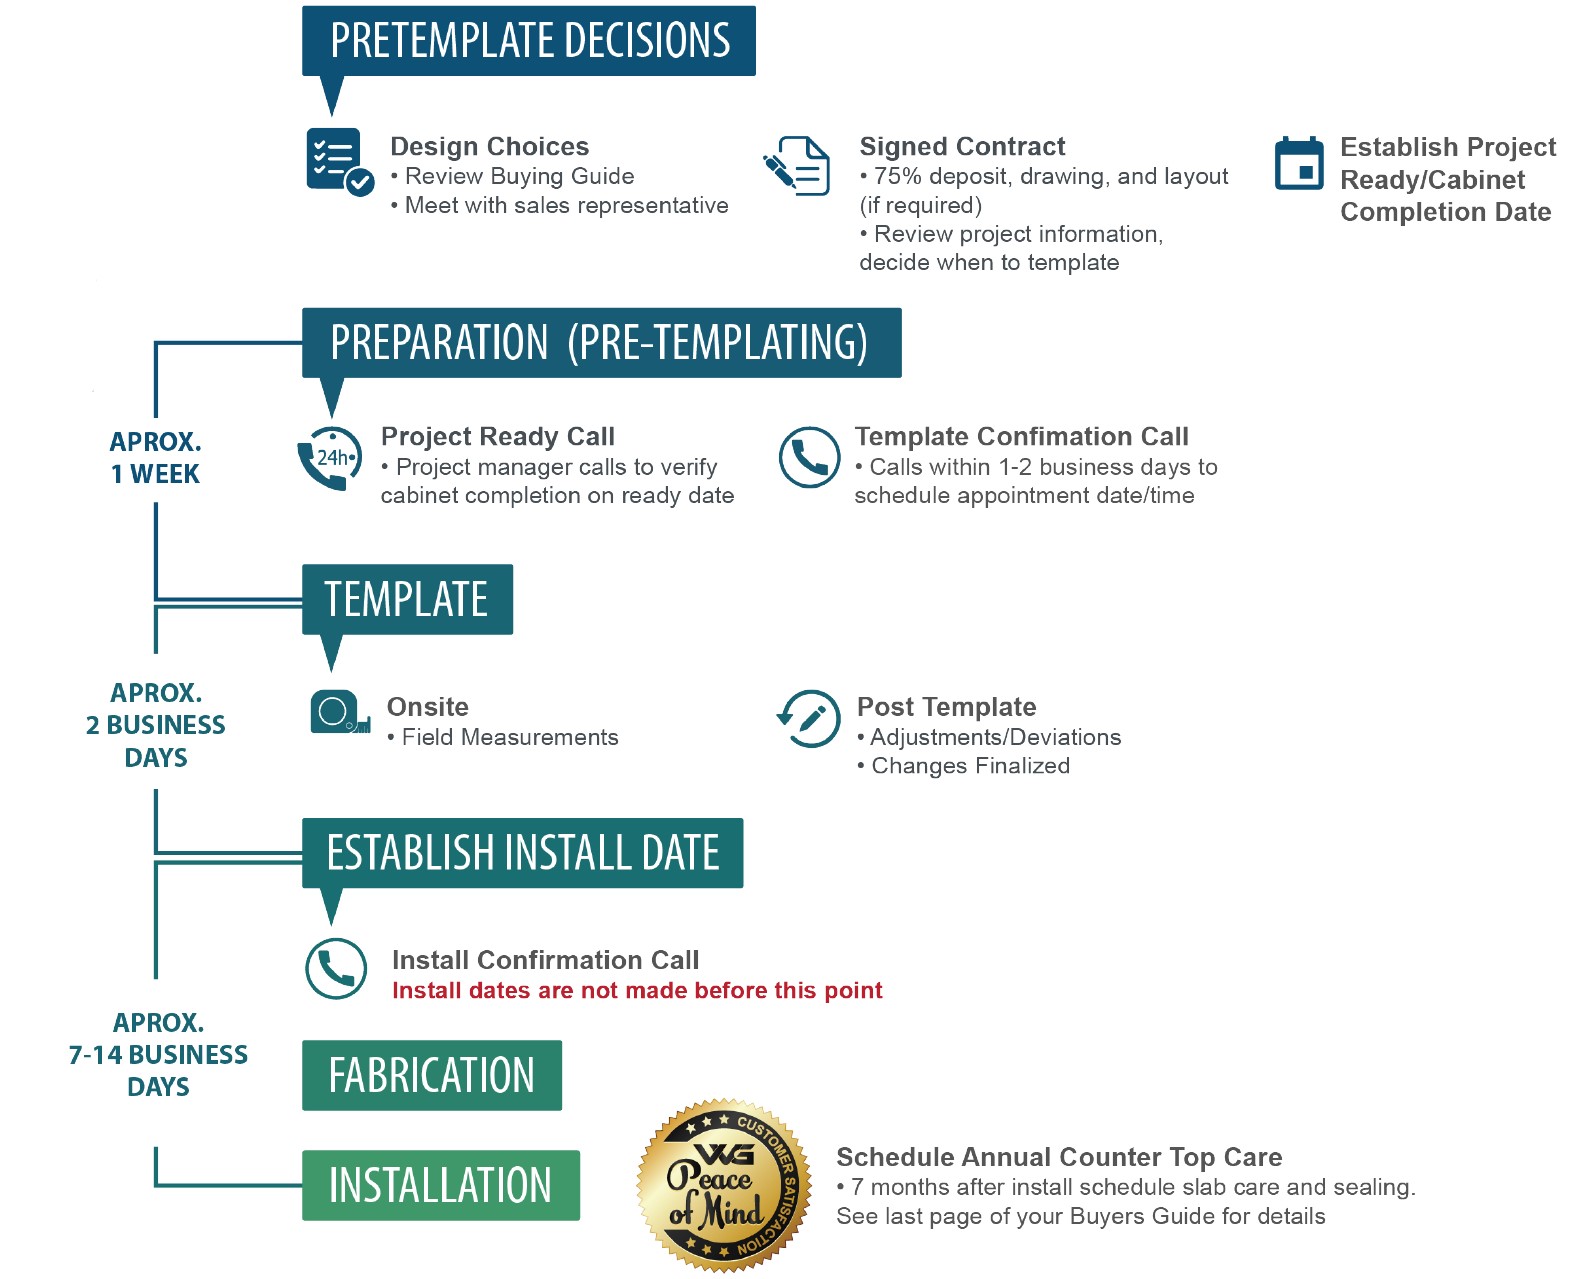


You will be provided with an estimate and layout, please review this for accuracy.

This is an estimate only and may change based on final measurements, material selection and edge choice.

VVG requires a minimum of 16 sq. ft. to template, fabricate & install a project. Fabrication only (customer supplied drawings) has no minimum sq. ft. requirement.


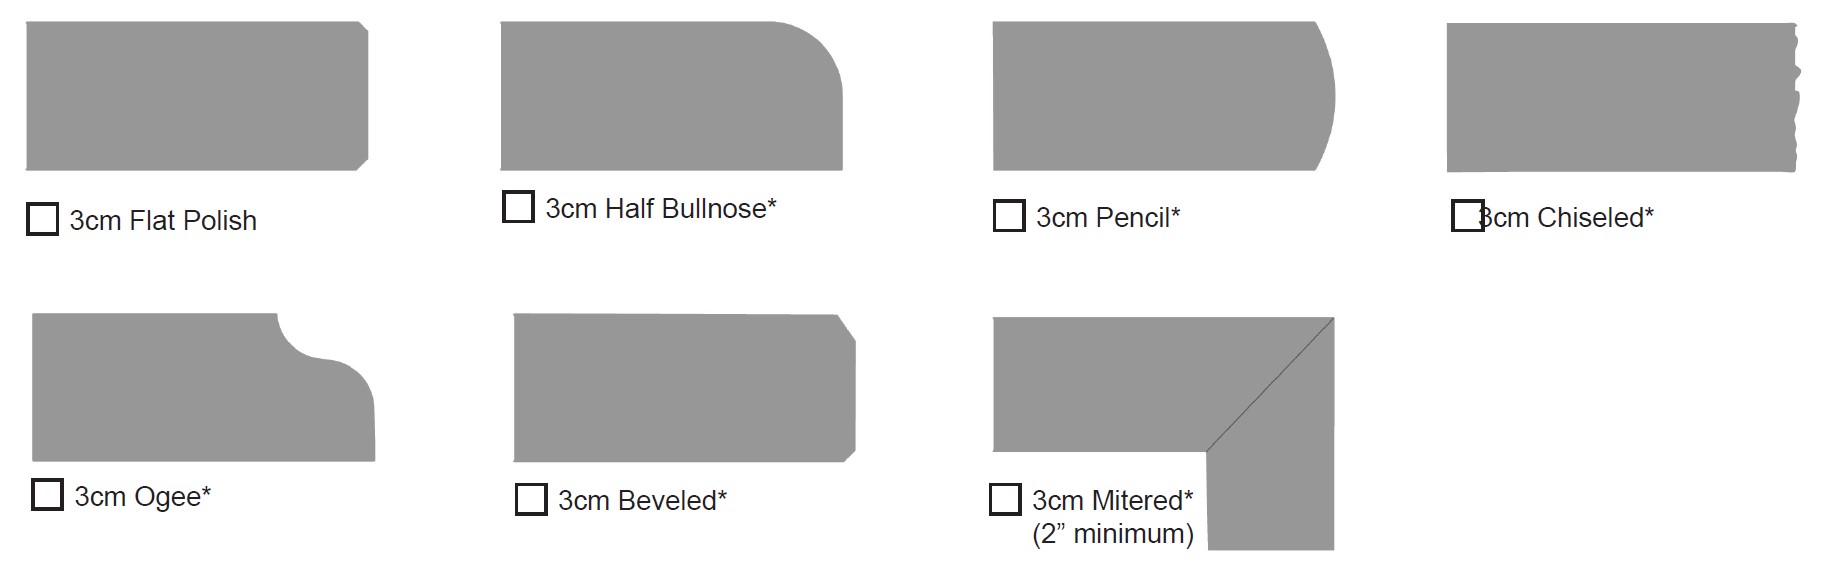
Would you like your outside corners square or round?


Select your corner radius.


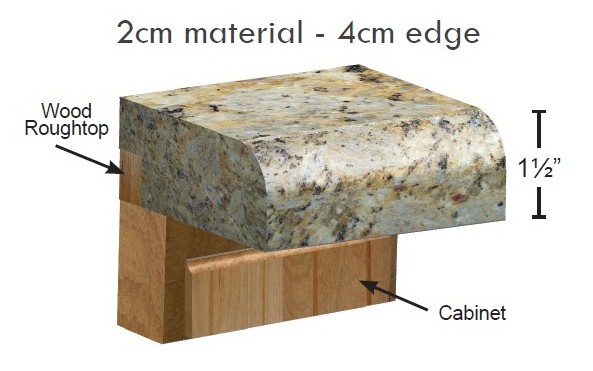
To maintain proper support and prevent tipping, countertop overhangs should not exceed more than 1/3 of the total countertop width without appropriate bracing.
Ask about appliance compatibility prior to purchasing new appliances.
Supply VVG the make, model numbers, and spec sheet of appliances that need to be cut into the counter.
Drop-in cooktops will need to be on-site at time of template. They will be “dry fit” at time of installation. Failure to have this on-site will result in an additional “trip charge”.

Slide-In range or cooktop with the controls on the front must be on-site at time of install. These usually require a “filler” piece of counter behind the range and may require the front of the counter to be “notched.”
Most dishwashers will attach to the cabinets on the side of the flange, however VVG will add a metal dishwasher bracket to all jobs that spans a dishwasher opening (24").


If you are providing the sinks, they need to be ON SITE at time of template and placed in the correct location. All farm style sinks need to be sitting in cabinet box with the top of sink flush with the top of cabinets at time of template. Custom sinks may require an additional drafting fee.


Provide sink models and who is providing the sink(s).
Specify your choice of sink material.
It is recommended to wait 24 hours after install to connect plumbing.


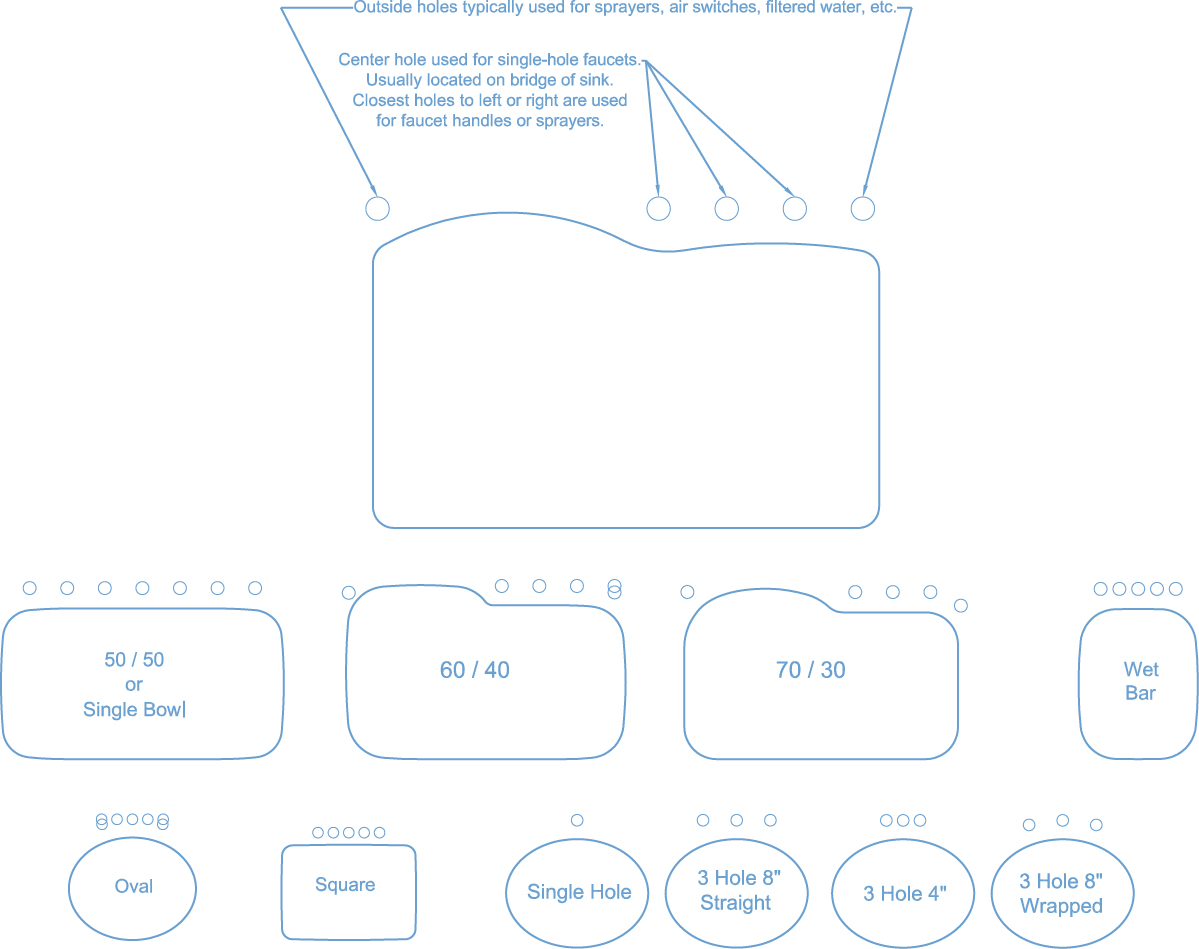


Provide sink models and who is providing the sink(s).


Please inform your sales rep if you have any special color requirements for your caulking.
Color variation is expected and an exact match to samples cannot be guaranteed.


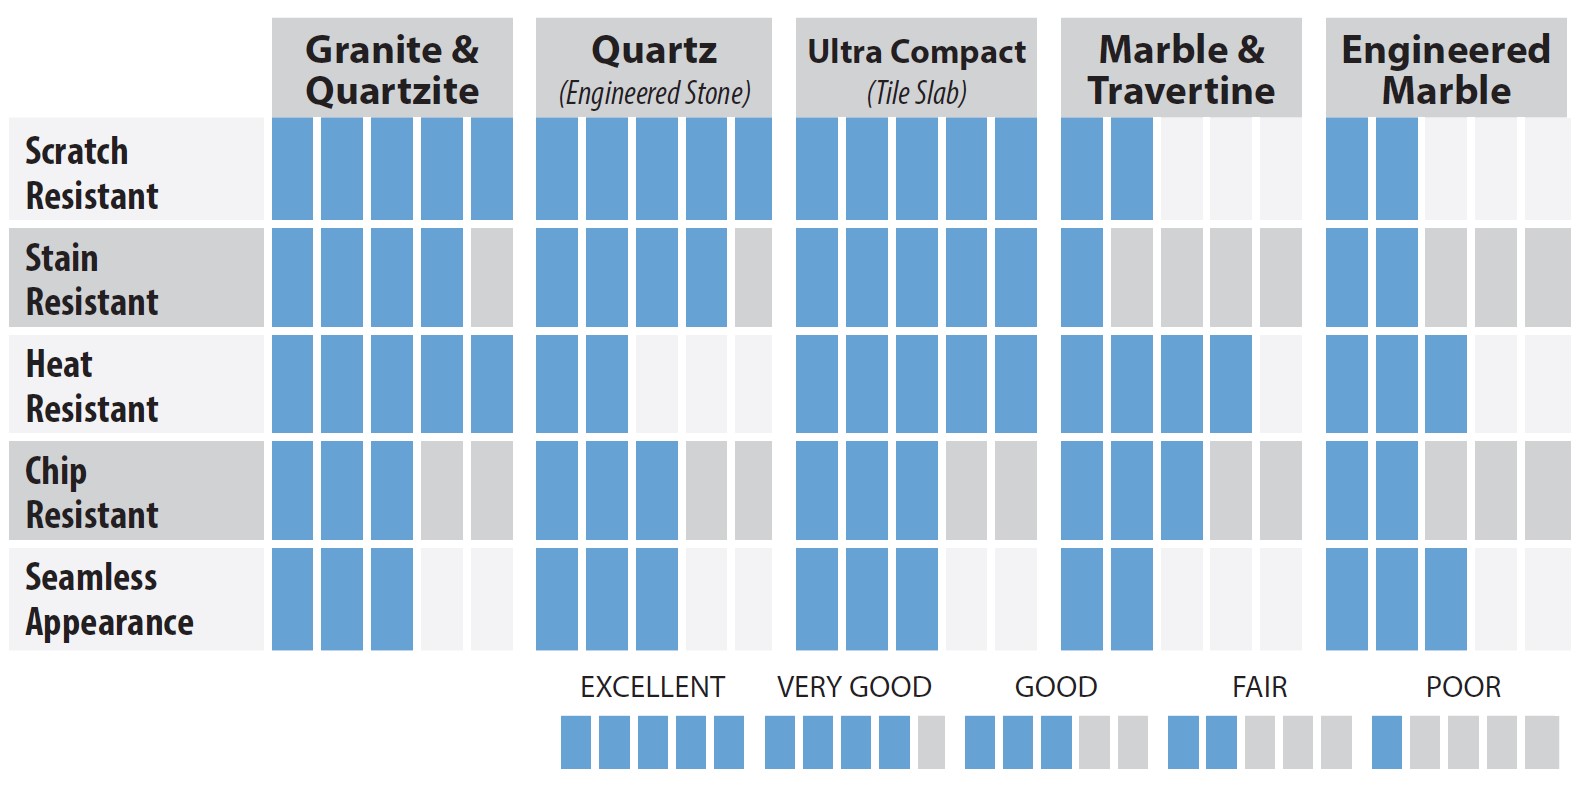


VVG does not guarantee vein flow match. VVG staff will do their best to have veins line up but this is not a cause for remake. Perfect Vein matching is not guaranteed even when a layout is approved.

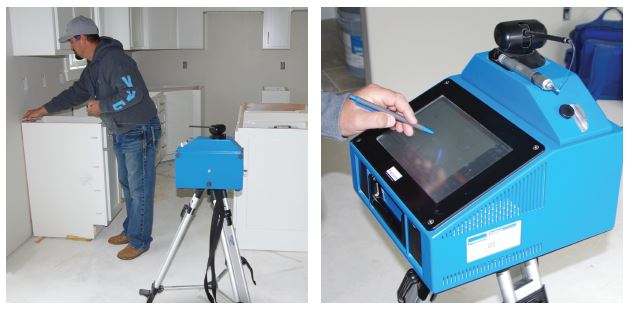
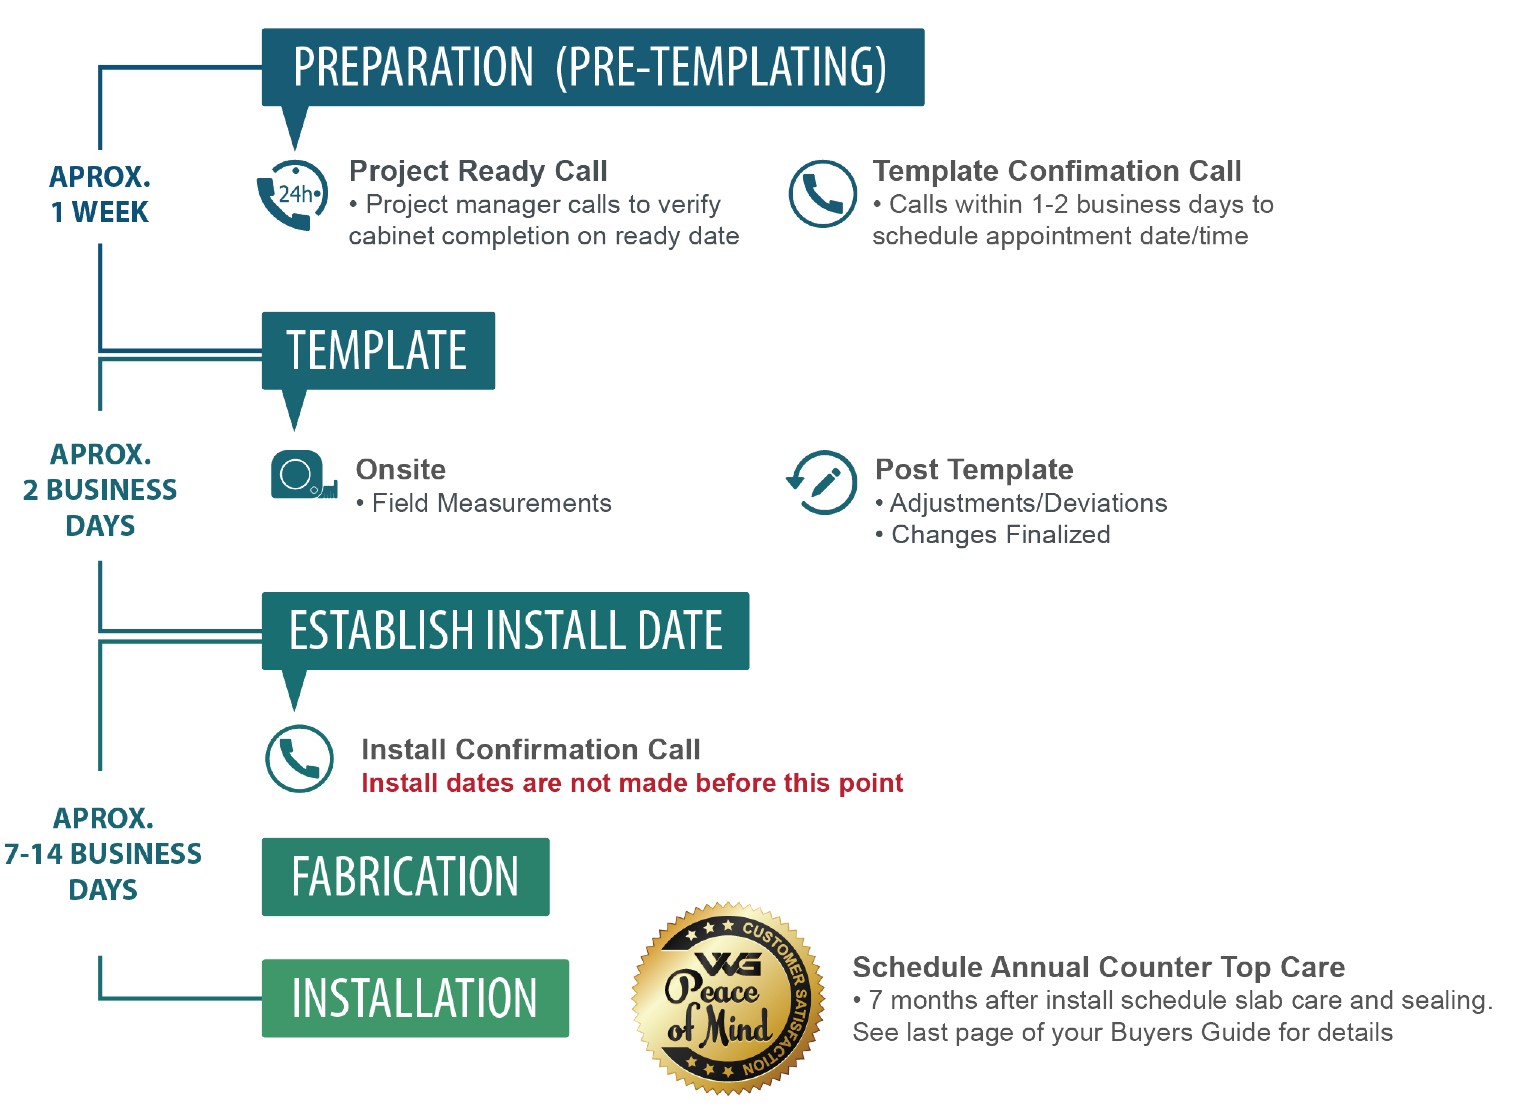
Pre-Templating Requirements & Checklist

A Return Trip Charge will be assessed for items not on-site at time of template.
Holes drilled at time of installation will incur an extra charge.
Prior to template (for remodel)
If client chooses to not continue with the job and the material is cut, the deposit will not be refunded. If the job has not been cut, $300 plus any restocking or return fees will not be refunded.

For any scheduling questions please contact the project management team at (435) 257-7814
Please have someone familiar with the job requirements available either in person or via phone for questions during the appointment.
Incomplete items at time of template could delay your installation date assignment.
In the event that material is not in stock, the completion date will not be assigned until the material arrives at VVG fabrication facility and any necessary layout approvals are received.
No changes can be made after a job has been approved for production.

Children or animals underfoot puts them at risk! We ask on the day of the installation your animals be kenneled and, if possible, arrange for your children to be with a caregiver.
We recommend waiting 48 hours before preparing food on your countertops to ensure that sealant is fully absorbed and cured.

Any field services required after 4:00 PM will be billed for overtime.
Scheduling communications and supervisor permission for overtime must be approved prior to scheduling.